.png)
.svg)
.svg)
.svg)
.svg)


Background
At Flowrite, we recently started writing longer content pieces and wanted to make our blogs more readable, starting from the most basic element – table of contents.
We are using Webflow and absolutely love it, but it turned out that creating ToC's scalably for CMS items wasn't that straightforward. All the existing solutions rely on either setting ids and links manually or using 3rd-party plugins.
We wanted a simple system that would automatically generate ToCs based on the headings in our blogs. That's what we built, and here's how you can do the same! 🔧
How it works?
- Design your ToC items. Make them any way you want – create hover states, animations, etc.
- Create a div for the ToC with a specific id anywhere on your CMS page.
- Insert a piece of code at the end of the <body> tag on your CMS page.
- ToCs get automatically generated for each CMS item.
Creating your dynamic Table of Contents
Design your ToC items
Give your ToC item a class (we use "tocitem") and style it any way you want.
My recommendation is to use a separate, private page for designing these elements. That way you can easily modify the design later if needed.
If you want to include more than just one types of headings, make sure to give them an additional class ("toc-h2", "toc-h3", etc.)
Create the element for your ToC
Add a div wherever you want your ToC to be and give it an id "toc". Again, you can style this element any way you want.
.png)
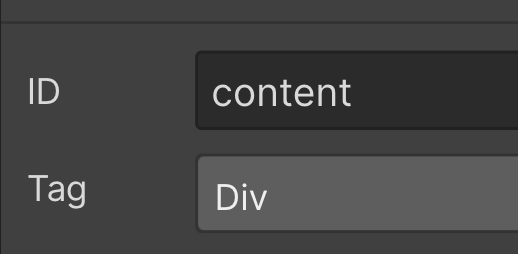
Lastly, give the Rich Text element an id "content". This will be needed later to make sure that we use the correct headings in the ToC.
Choose from two options
Since the ToCs will be automatically generated, we need to indicate which headings we want to include in them. In this post, we cover two options:
- Generating ToCs based on only a single static heading type, for example H2s.
- Generating ToCs based on multiple headings of your choice – for example, H2s and H3s for one blog post and H2s and H4s for another.
Option 1: Single-heading ToCs
Insert the following code at the end of your <body> tag on your collection pages. See the comments at the end of each line if you want to understand how it works.
Publish the site and you're good to go 👏
Option 2: Multi-heading ToCs
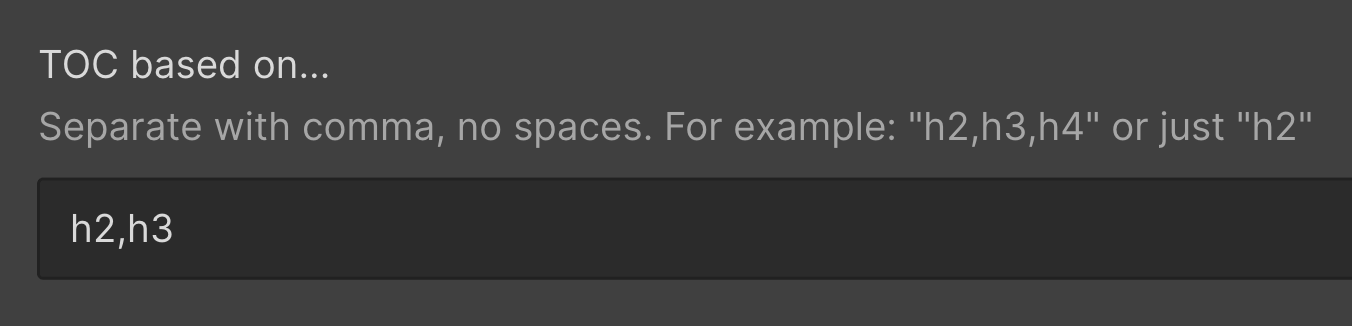
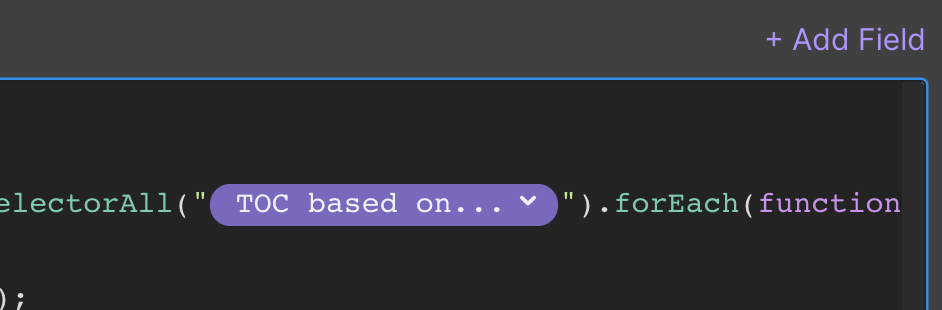
Let's start by creating a new text field in your Collection. We call it "TOC based on...". This is where you specify the headings that will be used in the ToC of each CMS item. Separate with a comma and don't include any spaces.
Now, insert the following code at the end of your <body> tag on your collection pages. See the comments at the end of each line if you want to understand how it works.
Lastly, make sure to replace [HEADINGS] with the value of your "ToC based on..." CMS field.
That's it, you're ready to publish. 🚀
Customization
Active states in a sticky Table of Contents
Inspired by Chris Coyier's post on CSS-Tricks, we built a way to add active states to visible ToC items – a great feature for sticky ToCs.
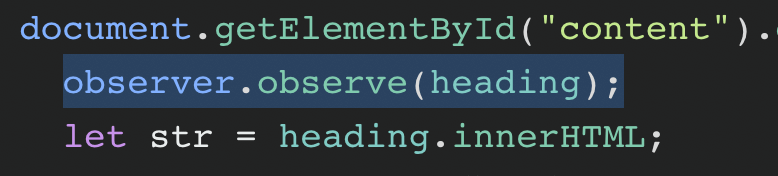
Firstly, add "observer.observe(heading);" at the beginning of the code you implemented earlier. See the screenshot for the correct location.
Then, add the following code snippet on top of all the existing ToC code:
The code adds a class called "active" to a visible tocitem and removes the class when a new tocitem appears.
Lastly, make sure to style the "active" class by giving it a different background color, for example.
Display ToCs on only some of the CMS items
If you don't want a ToC to appear on some of your CMS items, complete the following steps:
1. Leave the "ToC based on.." field empty.
If you're using Option 1, add a switch in your CMS collection to indicate whether the ToC should appear or not.
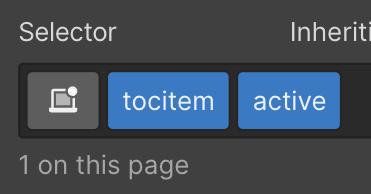
2. Make the visibility of your ToC div conditional based on the selector at step 1.
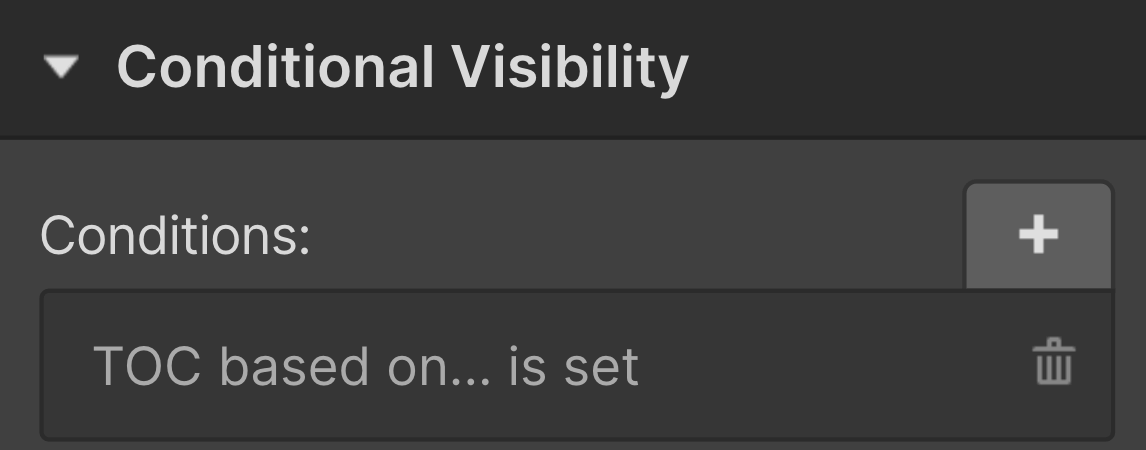
3. Create an if statement at the beginning of your ToC code snippet to avoid running the function if the field is empty. Remember to close with "}".

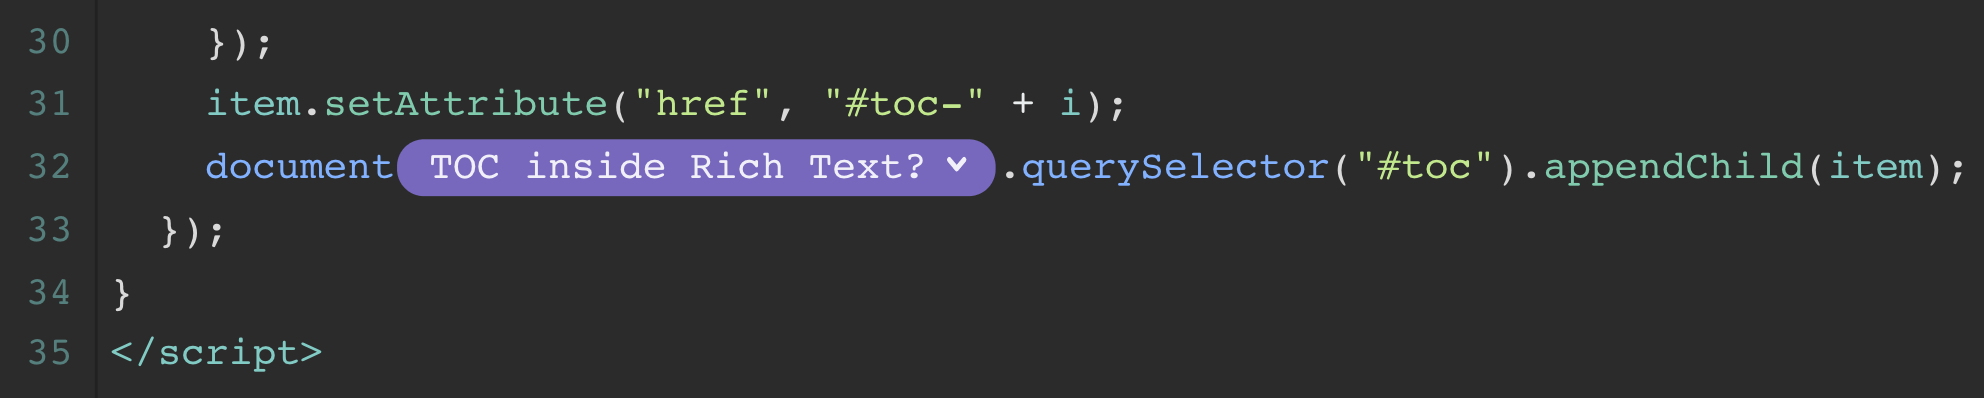
ToC inside your Rich Text element
If you want to place your ToC inside your Rich Text element, you can replicate the ToC div element with an embed code.
Create a custom code element inside your Rich Text and copy & paste "<div id="toc" class="toc"></div>" in the code field.

If you want to have an inline ToC on only some of the CMS items and a "normal" ToC on others, you need to do a couple of additional tricks:
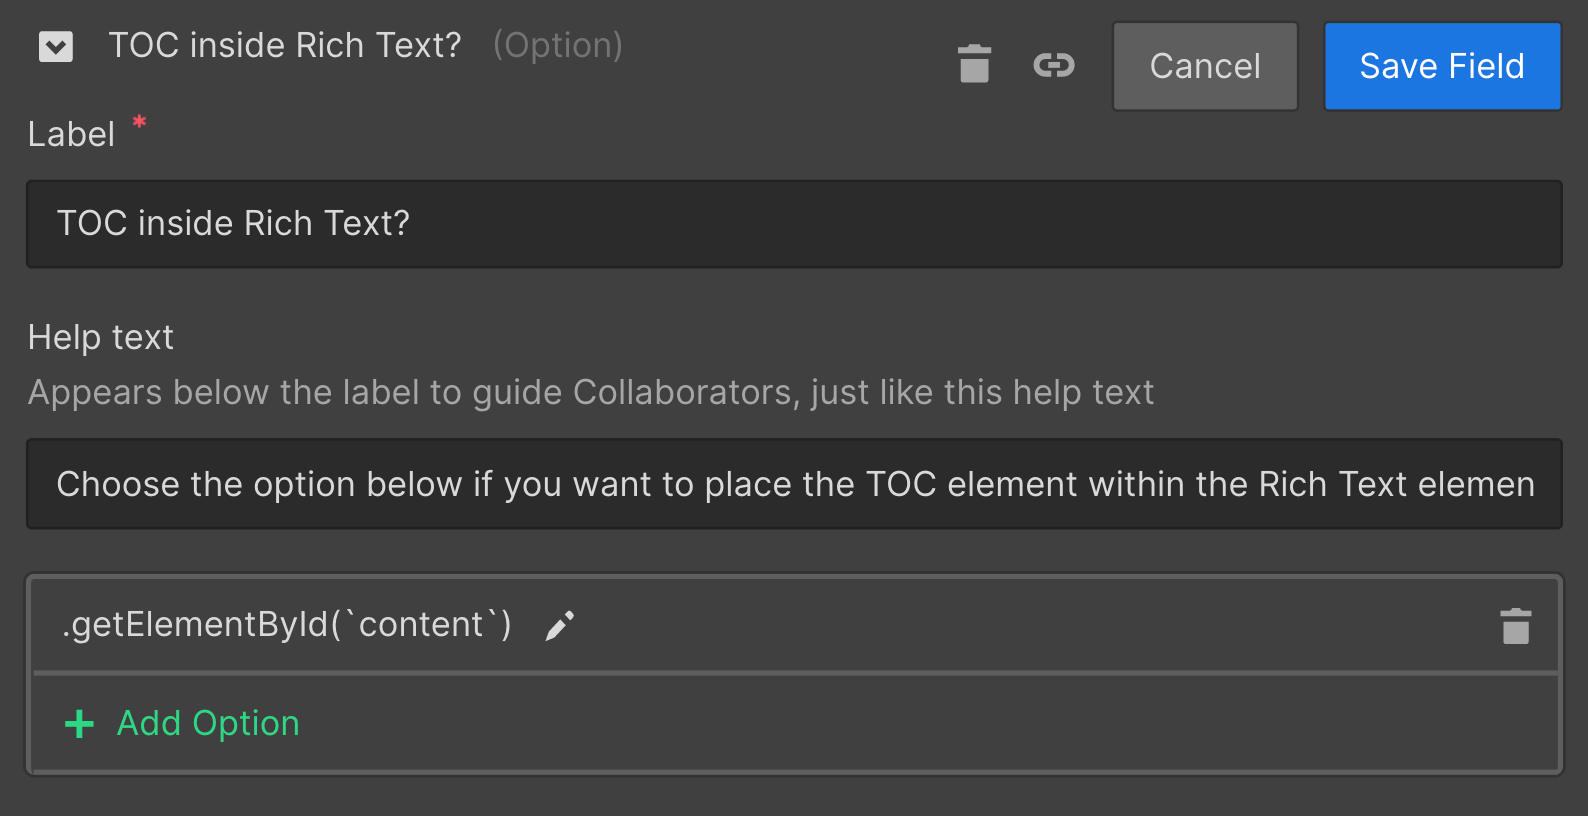
1. Create a Option selector with only one option: ".getElementById('content'). Select it on those CMS items where you want to have a ToC inside the Rich Text.
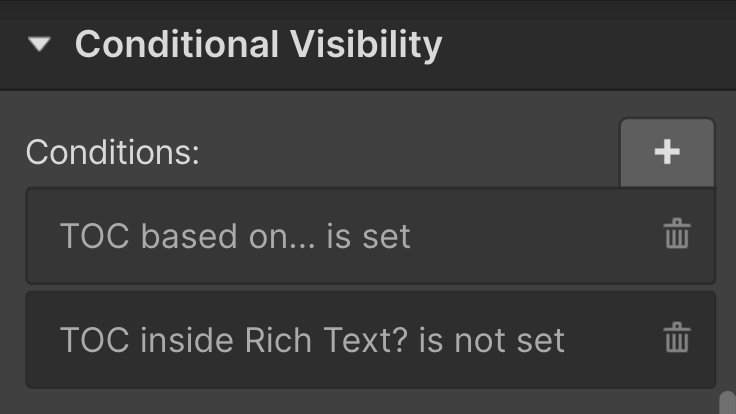
2. Display the "normal" ToC only if the selector is not set.
3. Add the value of the selector to the following part of the code. Now, if the selector has been selected, the code will append the ToC items inside the correct ToC div.
Avoid navbar overlay on scroll
You might notice that when clicking a ToC link, the page scrolls down to the correct heading but gets blocked by your navbar.
To fix this:
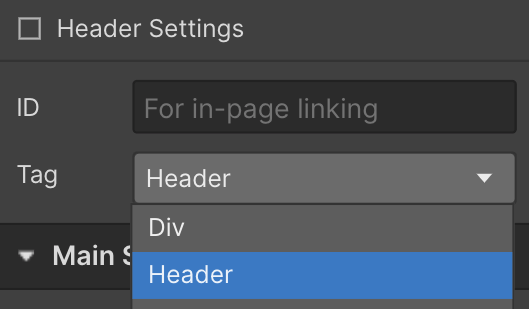
- Make sure that the position of your nav element is set to "fixed"
- Change the tag of the nav element to "Header"
That's it! In case you ran into any problems along the way, don't hesitate to send me an email or reach out via Twitter / LinkedIn.
I'd love to also know if you end up using this system, so please ping me if you did and share the post with someone else that might benefit from it ✌️
Supercharge your communication with Flowrite
Write emails and messages faster across Google Chrome.
.svg)
.png)
.png)

.svg)

.svg)
.svg)
.svg)
%201.svg)
Share this article
.svg)


%20(1).png)
%20(1).png)
.svg)

.svg)


